Die Druckerei verlangt Produktionsdateien für Hardcover, doch Sie verfügen noch immer über ein Titelbild im Softcover-Stil. Nachbesserungen beginnen selten erst an der Druckmaschine – sie beginnen bereits dann, wenn Ihre Geometrie, der Buchrücken und die Vorsatzblätter nie aufeinander abgestimmt wurden.
Bevor Sie die Druckvorlage erstellen, legen Sie Schnitt, Einbandumschlag, Falz, Rückenbreite, Seitenzahl und Vorsatzblätter fest; speichern Sie Folien- oder Spot-UV-Effekte auf separaten Produktionsebenen; nutzen Sie anschließend digitale Proofs für das Layout und physische Muster zur Überprüfung von Farbe, Falzgefühl und Passgenauigkeit der Veredelung.
Was das für Sie bedeutet: Nutzen Sie die untenstehenden Tabellen “Bevorzugen/Vermeiden”, „Bereit/Zurückstellen“ und „Freigeben/Beobachten“, damit Sie wissen, wann Ihr Hardcover-Paket für die Druckvorstufe bereit ist – und nicht nur „am Bildschirm gestaltet“ ist.”
Was Sie vor der Erstellung der Cover-Datei überprüfen sollten
Wenn Sie InDesign öffnen, bevor das Werk die Plattengröße und das Papier bestätigt hat, müssen Sie den Buchrücken schätzen. Eine spätere Überarbeitung kostet mehr als eine klärende E-Mail jetzt.
| Erst einfrieren | Warum Sie es brauchen | Bei Leerzeichen beibehalten |
|---|---|---|
| Fertige Verkleidung | Legt die Breite und Höhe aller Felder fest | “Etwa 6×9” ohne mm/Zoll-Arretierung |
| Seitenzahl + Lagerbestand | Bestimmt die Dicke der Wirbelsäule | Die Seitenzahl ändert sich weiterhin, nachdem das Titelbild angezeigt wird |
| Fallart | Gedruckter Kartoneinband vs. Leinen + Schutzumschlag | Umschlagvorlage vorhanden, Umschlaggestaltung noch offen |
| Form der Wirbelsäule | Rund vs. quadratisch – Änderungen bei der Berechnung der Zeilenumbrüche | Form noch unbestimmt, während der Wirbelsäulentyp bereits festgelegt ist |
Wenn Sie lediglich ein Produktfoto schicken und die Druckerei bitten, “es als Hardcover zu gestalten”, müssen Sie mit einer Verzögerung rechnen. Die Druckvorstufe braucht Zahlen, keine Moodboards.
- Bitten Sie um die Vorlage für den Einband, sobald die Beschnittmaße, die Papierart und die Seitenzahl einmal eingetragen sind.
- Geben Sie im Angebot, im PDF-Dokument und im Rückenbreitenrechner jeweils dieselbe Seitenzahl an – keine stillschweigenden Änderungen.
- Geben Sie bitte an, ob Sie einen gedruckten Einband, einen Stoffeinband und/oder einen Schutzumschlag als separate Dateien benötigen.
- Um sich einen Überblick über allgemeine Vorgehensweisen beim Verpacken und Einbetten von Schriftarten zu verschaffen, werfen Sie einen Blick auf die Leitfaden zur Vorbereitung von Buchdateien—dann komm hierher zurück, um die gebundene Ausgabe zum Thema Geometrie zu holen.
Wenn Sie einmal mit der Gestaltung des Cover-Artworks für ein Softcover mit Beschnittzugabe begonnen hatten, hat die Druckerei die Umschlagform und die Falz neu angelegt, nachdem Ihr Softproof auf dem Bildschirm “in Ordnung” aussah. Fixieren Sie die vier Zeilen oben, bevor Sie den Titeltext platzieren.
Fügen Sie diese Zeile in Ihre Projektbeschreibung ein: “Schnittmaße __ × __ / Seiten __ / Papierart __ / Rückenbreite __ / Einbandart __.” Wenn noch Felder leer sind, sind Sie noch nicht bereit, die Umschlagdatei zu erstellen.
Umschlag, Falz, Buchrücken und Beschnittzugabe
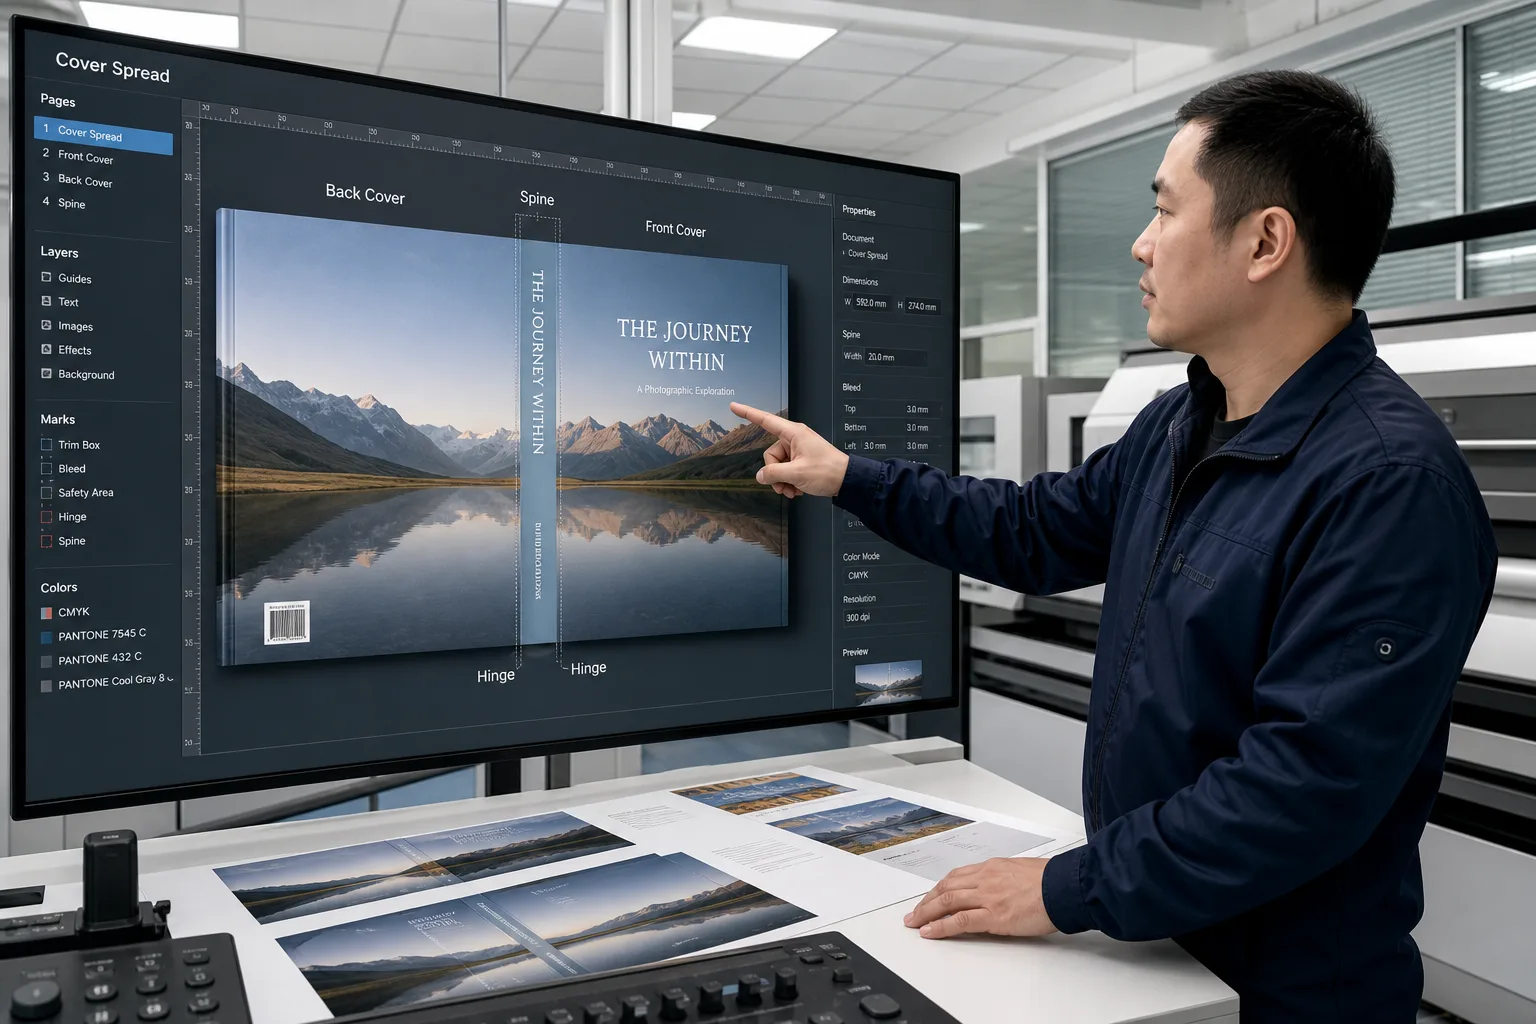
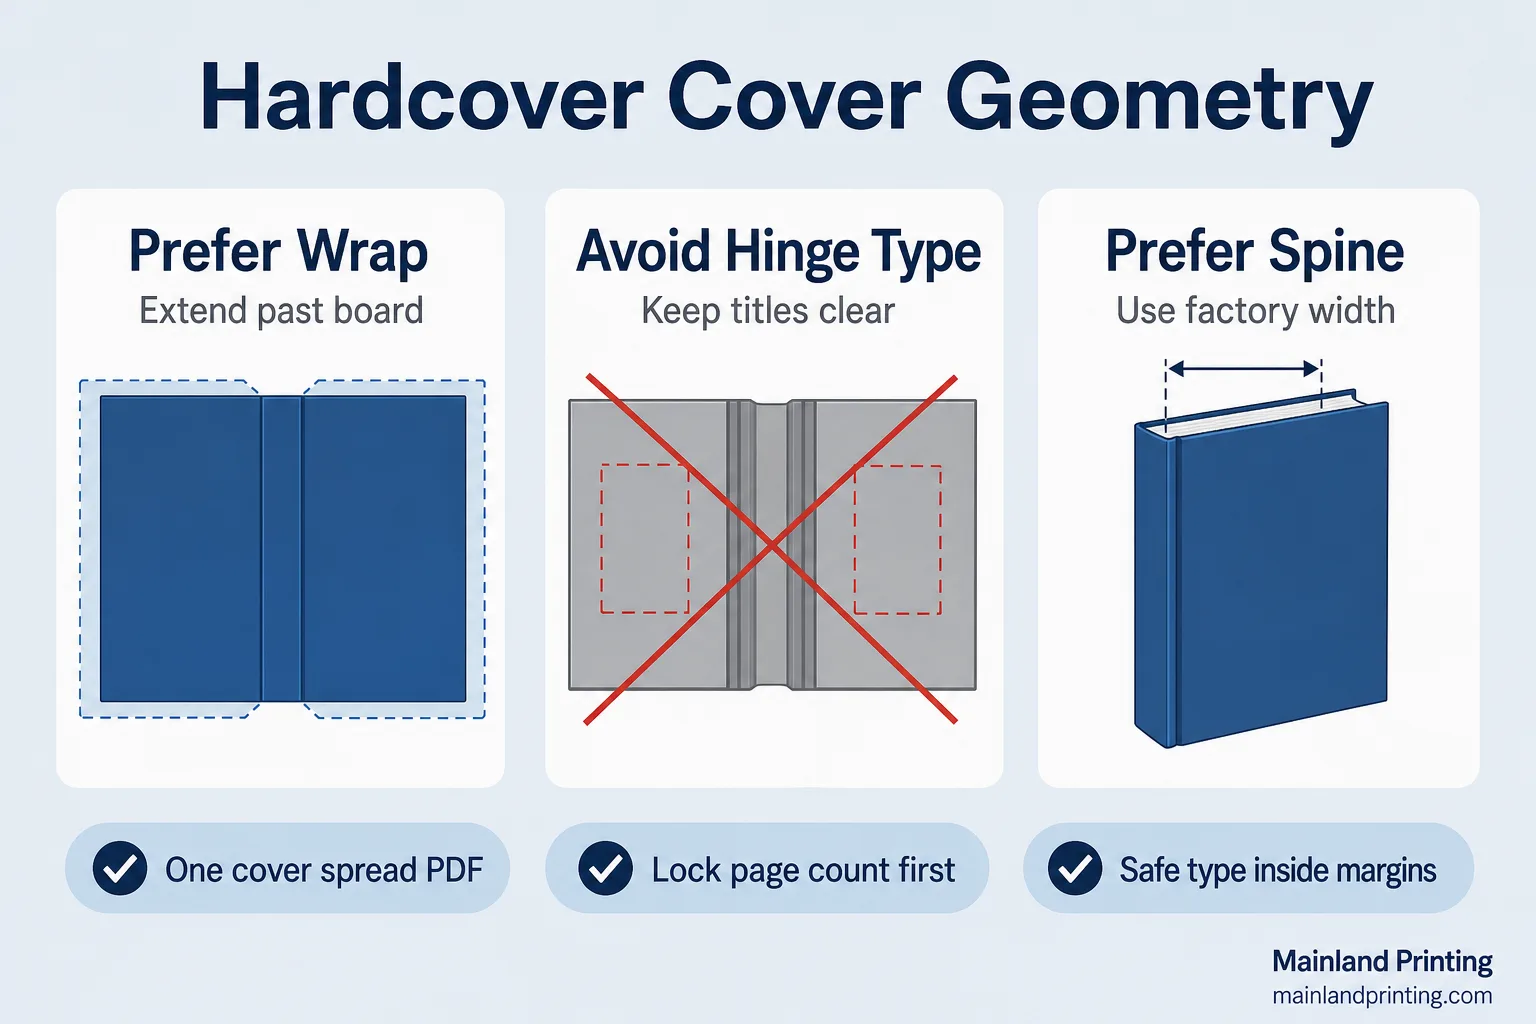
Bevor Sie den Einband wie ein Poster behandeln, denken Sie daran, dass Sie eine einteilige Umschlaghülle gestalten: Rückseite, Buchrücken, Vorderseite sowie den über den Kartonrand hinausragenden Umschlag – und die Falzbereiche neben dem Buchrücken, die sich biegen, wenn Leser das Buch aufschlagen.
| Fläche | Bevorzugen | Vermeiden Sie |
|---|---|---|
| Umschlag / Beschnittzugabe | Hintergründe über den Kartonrand hinaus verlängern + je nach Vorlage umbrechen (oft weit mehr als bei Softcover 0,125") | Den Beschnitt des Taschenbuchs so kopieren, als ob die Buchdeckel nicht umgeschlagen wären |
| Scharnier | Halten Sie kritische Typen und Flächen von den Biegebändern der Scharniere fern | Den Titel quer über das Scharnier platzieren, “weil er so zentriert aussah” |
| Wirbelsäule | Text mittig aus der werkseitigen Breite ausrichten; seitlich Platz lassen | Schätzung der Wirbelsäulendicke anhand eines Stockfotos |
| Sicherheitsart | Achten Sie darauf, dass die Titel innerhalb der Sicherheitsränder auf Vorder- und Rückseite sowie am Buchrücken bleiben | Barcodes oder Werbetexte in den Beschnitt oder die Umschlagfläche verschieben |
Wenn Ihre Vorlage Scharnierführungen enthält, behandeln Sie diese als feste Begrenzungen für den Text. Hintergründe dürfen sich überschneiden; lesbare Wörter hingegen nicht.
Achtung: Wenn Sie den 0,125"-Beschnitt einer Softcover-Ausgabe auf einen Einbandüberzug kopieren, wird der Einband in der Regel zu klein ausfallen, selbst wenn der Softproof auf dem Bildschirm randlos erscheint.
- Erstellen eine PDF-Datei mit Titelbild – nicht drei separate Exportdateien für Vorderseite, Buchrücken und Rückseite.
- Passen Sie die Dokumentgröße genau an die Vorlage an; nehmen Sie beim Export keine Skalierung vor.
- Zoomen Sie heraus und fragen Sie sich: Wenn sich die Umhüllung um ein paar Millimeter verschiebt, wird dann etwas Wichtiges abgeschnitten?
- Zum Begriff „Tinte über den Beschnitt hinaus“ siehe Beschnitt beim Drucken—dann orientieren Sie sich an der gebundenen Ausgabe und nicht an der Gewohnheit, Flyer zu lesen.
- Die Benennung der Endbearbeitungen sollte den branchenüblichen Gepflogenheiten beim PDF-Austausch entsprechen – siehe ISO-Standard für den Austausch von PDF-Dateien wenn Ihre Druckerei die PDF/X-Konformität verlangt.
Als Sie lediglich den Beschnitt eines Taschenbuchs gespiegelt hatten, wies Ihr erstes Musterexemplar weiße Kartonkanten auf, und der Titel bog sich in die Falz hinein. Legen Sie die werkseitige Einbandbreite fest, bevor Sie die Farbverläufe optimieren.
Wenn der Text auf dem Buchrücken bei einer Breite von unter 0,35" zu eng wirkt, kürzen Sie die Zeile oder wählen Sie eine kleinere Schriftart für den Buchrücken – verkleinern Sie die Buchstabenformen nicht so weit, dass sie auf der Druckmaschine ausfransen.
Bevor Sie den Export starten, schalten Sie die Vorlagenhilfslinien noch einmal aus und wieder ein. Sie möchten, dass die Druckvorlage keine überflüssigen Hilfslinien mehr enthält, und Sie möchten dennoch eine letzte Überprüfung der Falzstellen bei sichtbaren Hilfslinien durchführen.
Innenseiten, Vorsatzblätter und Seitenzahl
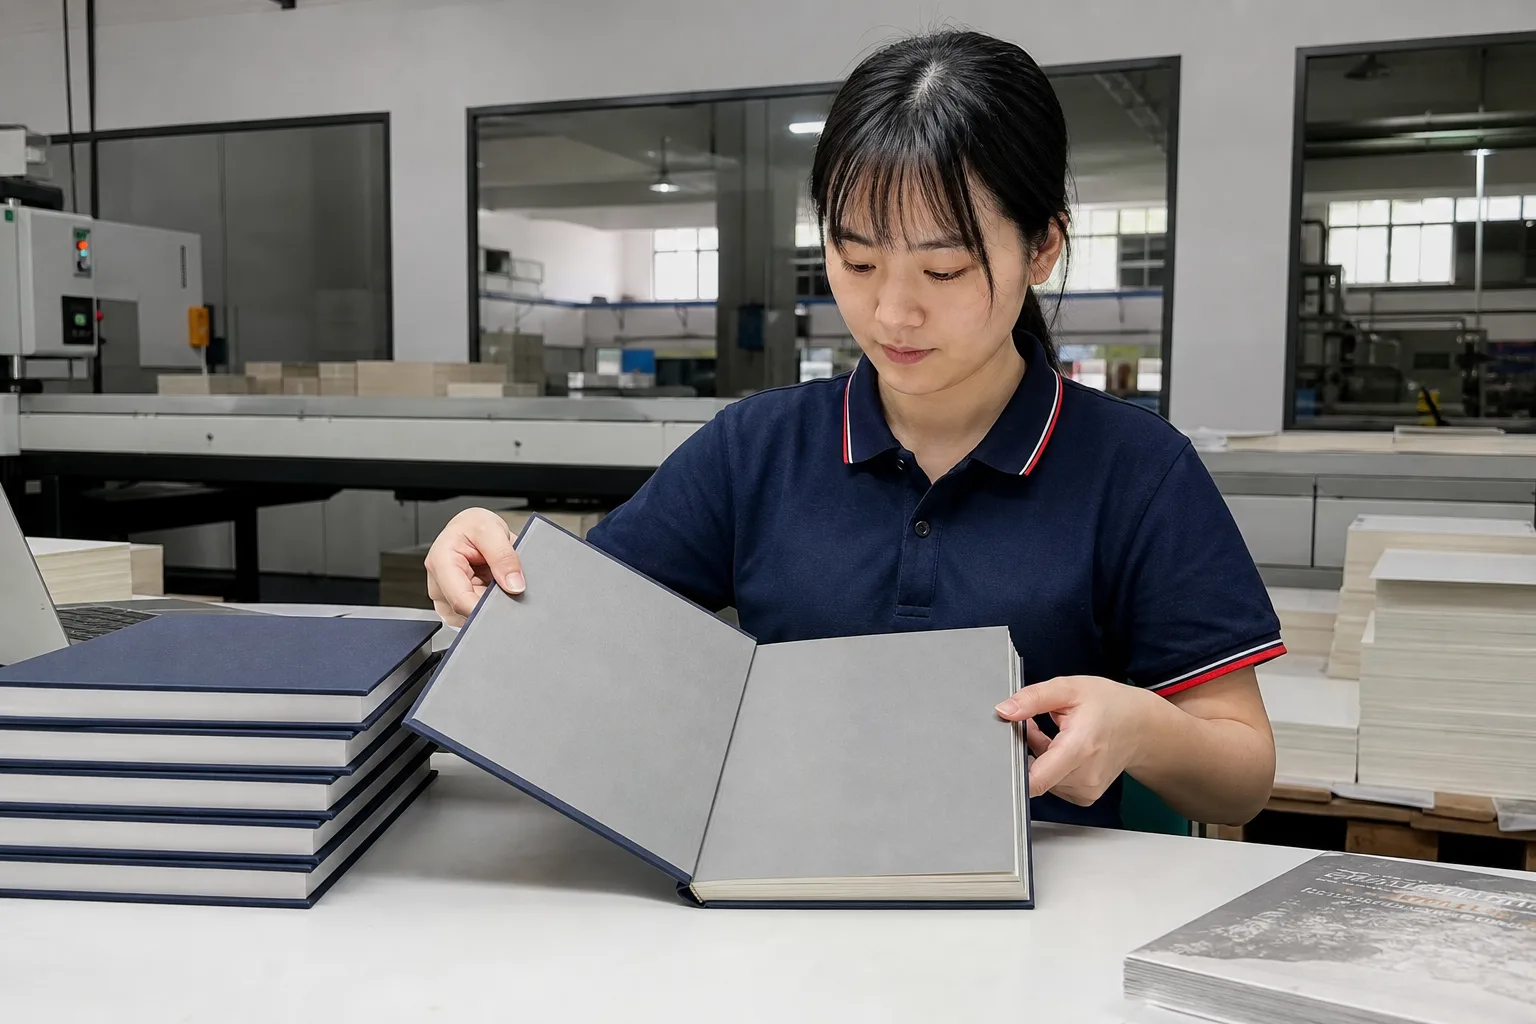
Wenn man den Buchrücken einfriert, aber weiterhin Innenseiten hinzufügt, verändert man damit unmerklich die Dicke. Vorsatzblätter sind Teil der Einbandstruktur und keine Verzierung, die man erst nach dem Einbinden hinzufügt.
| Kontrollpunkt | Bereit | Halten |
|---|---|---|
| Anzahl der Seiten | Die endgültige Seitenzahl im PDF stimmt mit dem Angebot und der Berechnung des Buchrückens überein | “Vielleicht fügen wir später noch 8 Seiten hinzu.” |
| Vorsatzblätter | Material, Farbe sowie bedruckt vs. unbedruckt sind angegeben | Unter der Annahme, dass die Anlage “einfach die Sahne abschöpft” |
| Leerzeichen / Parität | Absichtlich freigelassene Felder gekennzeichnet; Plan für ungerade/gerade Zahlen vereinbart | Unerwartete Leerstellen, nachdem der Buchrücken bereits geschnitten wurde |
| Rand / Randbereiche | „Inner Margin“ übersteht das Unentschieden gegen Binding | Eine Schriftart, die sich wie ein Taschenbuch an den Rand schmiegt |
Wenn Sie die Papiermenge ändern, nachdem der Einband bereits freigegeben wurde, müssen Sie den Buchrücken neu anfertigen – verlassen Sie sich nicht darauf, dass die alte Einbandhülle noch passt.
- Inhalt als einseitiges PDF mit eingebetteten Schriftarten exportieren.
- Teilen Sie der Druckerei mit, ob es sich bei den Vorsatzblättern um unbedrucktes, bedrucktes oder farbiges Papier handelt.
- Behalten Sie die Bildauflösung entsprechend der Druckabsicht bei (in der Regel 300 ppi) und konvertieren Sie übrig gebliebene Sonderfarben in CMYK, es sei denn, Sie haben eine echte Sonderfarbe bestellt.
- Zählen Sie die PDF-Seiten genauso wie in Ihrer Druckerei, bevor Sie den Buchrücken neu berechnen – Verwechslungen zwischen „Blättern“ und „Seiten“ führen häufig zu Verzögerungen.
Als Sie einen Einband für 256 Seiten genehmigt hatten und dann bedruckte Vorsatzblätter sowie vier Marketing-Blanko-Seiten einfügten, musste die Druckerei die Rückenumhüllung neu anfertigen. Diese ist erst fertig, wenn Seitenzahl, Vorsatzblätter und Rücken eine einheitliche Zahl aufweisen.
Falls Ihr Designer und Ihre Druckerei unterschiedliche Definitionen für die Seitenanzahl verwenden (Blätter vs. Seiten), sollten Sie die Begrifflichkeiten abgleichen, bevor Sie den Buchrücken neu berechnen. Sie und die Druckerei müssen dieselben PDF-Seiten zählen.
Für Sonderveredelungen sind separate Druckvorlagen erforderlich
Wenn Sie Folienprägung, Spot-UV-Lackierung oder Prägung wünschen, sollten Sie diese Angaben nicht in derselben CMYK-Illustrationsebene verstecken und darauf hoffen, dass die Druckmaschine sie “erkennt”. Sie benötigen separate Produktionsvorlagen, die von den Stanz- und Lackierwerken passgenau ausgerichtet werden können.
| Absicht zur Beendigung | Löschen | Ansehen |
|---|---|---|
| Folienprägung / Prägung | Vektormaske oder 100%-Datei mit schwarzem Stempel, benannt nach der Oberflächenausführung | Gold als gelbes CMYK dargestellt, ohne Stempelebene |
| Spot UV | Separate Lackplatte, die auf die Verkleidung ausgerichtet ist | Ein “glänzender Look” nur in einem flachen JPEG-Mockup |
| Anmeldung | Hinweise zu Werktoleranzen in Kleingedrucktem zulassen | Hauchdünne Folie über unruhigen Fotorändern – ganz ohne Trap-Probleme |
Fragen Sie Ihre Druckerei, wie die Masken geliefert werden sollen – als PDF-Ebene, als Sonderfarbe mit dem Namen „FOIL“ oder als zweite Datei. Halten Sie sich an die von ihr vorgegebene Methode; erfinden Sie keine dritte.
- Verwenden Sie nach Möglichkeit Vektorgrafiken für die Druckvorlagen; vermeiden Sie bei Stanzformen unscharfe JPEG-Kanten.
- Benennen Sie Dateien aussagekräftig: Title_Cover_CMYK.pdf, Title_Cover_FOIL.pdf.
- Vergewissern Sie sich, ob sich das Soft-Touch-Laminat unter oder neben dem Spot-UV-Lack befindet, bevor Sie die Effekte übereinanderlegen.
Als Sie das “Gold” einmal in die PDF-Datei des Covers eingefügt hatten, gab es für die Folienprägung nichts mehr zu prägen, und Ihr Zeitplan geriet um eine Woche in Verzug. Entfernen Sie die Maske, bevor Sie sich über das Muster freuen.
Wenn sich Ihr Druckbild nahe am Bildrand befindet, erkundigen Sie sich, wie viel Millimeter Toleranz das Werk zulässt. Sie sollten sich des Risikos bewusst sein, bevor Sie einen hauchdünnen Folienrand genehmigen, der nur auf einem Retina-Display scharf aussieht.
Lassen Sie sich vor der Angebotserstellung einen Korrekturabzug anfertigen
Senden Sie uns Informationen zu Beschnitt, Seitenzahl, Umschlagvorlage sowie die Finishing-Masken – wir weisen Sie auf Lücken bei Einbandumschlag, Falz und Druckvorlage hin, bevor Sie ein Angebot für ein Hardcover-Buch endgültig bestätigen.
Lassen Sie sich vor der Angebotserstellung einen Korrekturabzug anfertigen
Was jeder bestätigen kann
Bevor Sie einen Softproof als Freigabe für die Serienproduktion betrachten, sollten Sie unterscheiden, was sich auf dem Bildschirm bestätigen lässt und was sich nur anhand eines gebundenen Exemplars nachweisen lässt.
| Siehe | Digitaler / Softproof | Physikalische Probe |
|---|---|---|
| Layout & Schrift | Stark – Schnittmarken, Text auf dem Buchrücken, fehlende Seiten | Vermittelt ein authentisches Gefühl von Scharnier und Brett |
| Farbe | Richtungsabhängig nur bei nicht kalibrierten Bildschirmen | Besser geeignet für markenrelevante Farbtöne |
| Folien / UV | Zeigt im besten Fall Positionsentwürfe an | Erforderlich für die Registrierung und die Haptik |
| Vorsatzblätter | Kann die Platzierung von Grafiken anzeigen | Bestätigt die Einleimung und den Farbton |
Wenn das Risiko hinsichtlich Farbe und Druckqualität hoch ist, sollten Sie die gebundene Druckprobe nicht überspringen, nur weil die PDF-Datei scharf aussah. Warum sich digitale und Offset-Verfahren unterscheiden, erfahren Sie hier: Varianz der digitalen Abtastwerte Bevor Sie „Drucken“ bestätigen.
- Nutzen Sie digitale Korrekturabzüge, um falsche Rückenbreiten, fehlende Leerräume und Tippfehler im Falz zu erkennen.
- Beurteilen Sie anhand von physischen Mustern die Haptik des Laminats, die Griffigkeit der Folie und die Steifigkeit des Gehäuses.
- Geben Sie an, welcher Nachweistyp Ihr PO freischaltet – lassen Sie “Nachweis genehmigen” niemals undefiniert.
- Wenn Sie eine Routing-Lösung vom Typ „Proof“ benötigen, vergleichen Sie die Optionen in der Leitfaden für Druckproofs.
Wenn Sie lediglich einen Softproof auf einem Folientitel signiert haben, wirkte die Serienproduktion flacher und leicht versetzt. Warten Sie mit Titeln, bei denen die Oberflächenqualität entscheidend ist, bis Sie ein physisches Exemplar in den Händen halten.
Datei zur Druckvorabprüfung senden
Wenn die Zeilen „Bevorzugen/Vermeiden“ und „Bereit/Zurückstellen“ grün sind, stellen Sie den Auftrag zusammen, damit die Druckvorstufe die Geometrie überprüfen kann – und nicht nach fehlenden Masken suchen muss.
- PDF-Datei der Titelseite im Vorlagenformat + klar benannte Schnittmasken.
- PDF-Datei des Innenlayouts, Einzelseiten, eingebettete Schriftarten, endgültige Seitenzahl im Dateinamen oder in einer Anmerkung angegeben.
- Beschreibung der Vorsatzblätter (einfarbig / bedruckt / Standardfarbe) in einem Satz.
- Quelle für die Rückenbreite: Seitenzahl + Papier + Ergebnis des Werksrechners.
- Prüfpfad: nur soft oder soft + physisch vor der Serienfertigung.
Falls Sie sich nach der Bereinigung der Dateien immer noch Sorgen um die Stückkosten machen, sollten Sie dieses Thema separat mit dem Kostenübersicht für den Druck von Hardcover-Büchern—Fügen Sie Preisänderungen nicht in eine erneute Einreichung der Geometriedaten ein.
- Laden Sie einen Ordner hoch oder übertragen Sie ihn; vermeiden Sie fünf Chat-Anhänge mit widersprüchlichen Datumsangaben.
- Bitten Sie die Druckvorstufe um eine schriftliche Liste der Kennzeichnungen: Umschlag, Falz, Buchrücken, Vorsatzblätter, Veredelungen.
- Erst dann fordern Sie bitte die Angebotsversion an, die mit diesen gesperrten Dateien verknüpft ist.
Ihre Checkliste für Hardcover-Dateien ist erst dann abgeschlossen, wenn die Druckerei anhand eines vereinbarten Pakets produzieren kann – nicht, wenn das Layout auf Ihrem Laptop gut aussieht. Senden Sie das Freigabepaket einmalig und nehmen Sie anschließend nur noch Änderungen gemäß der schriftlichen Fehlerliste vor.
Wenn Sie bei allen Überarbeitungen denselben Ordnernamen und denselben Datumsstempel beibehalten, verringern Sie das Risiko, dass eine alte Titelseite versehentlich in den Druck gelangt. Betrachten Sie die Dateiverwaltung als festen Bestandteil der Checkliste und nicht als nachträglichen Einfall.