Tired of promotional products that fail your brand? This is the definitive printer’s guide to sourcing custom promotional products from China. We reveal the exact technical process and supplier questions that guarantee your quality, color consistency, and on-time delivery.
Successfully sourcing custom promotional products from China requires a technical approach. Start with a “print-ready” tech pack (vector files, Pantone codes, and material benchmarks). Next, implement a 3-phase sampling process (material, mock-up, pre-production). Finally, vet suppliers by asking specific questions about their color management (Delta E) and in-line QC process.
In the full guide below, we’ll show you the exact “insider” vetting questions that expose bad suppliers, and reveal the “Golden Sample Trap” (and how to avoid it).
Why 90% of Orders Are Flawed from the Start

Based on our experience as printers, the majority of “production disasters” don’t happen on the factory floor. They are locked in from the moment the order is placed.
As brand managers, you are likely falling into two common traps you may not even be aware of.
Trap 1: The “Garbage In, Garbage Out” (GIGO) File Problem
In the printing world, we have a saying: “Garbage In, Garbage Out.” It means a low-quality input file can only produce a low-quality physical product.
Here’s a hard statistic for you: from our internal data, over 60% of design files we receive from clients are not “print-ready” or “production-ready.” This is the number one source of quality failure.
Your supplier might say “yes” to the JPG or PNG file you sent, but they are not telling you the truth. Here is what’s really happening:
Vector vs. Raster:
You send a JPG of your logo. On your screen, it looks fine. But when the factory enlarges it to print on a t-shirt, it becomes a blurry, pixelated mess. A JPG is a “raster” file, a fixed map of pixels.
What you must provide is a ‘vector’ file (like an .AI or .EPS). A vector file is a mathematical formula that can be scaled infinitely without any loss of quality.
The RGB Color Lie:
The logo on your website is in RGB (Red, Green, Blue) format, which is designed for screens that emit light. Physical products use ink or pigment, which absorb light, and are typically produced using Pantone (PMS) or CMYK color modes.
The “bright electric blue” on your screen simply does not exist in any physical ink. A good supplier will stop and ask you for a precise Pantone (PMS) color code. A bad one will just guess.
The Font Replacement Nightmare:
We once had a client whose beautiful, custom-branded font was replaced on their entire order of notebooks with… Times New Roman. Why? They sent a design file without “creating outlines” for the text.
The factory didn’t have their custom font, so their system automatically substituted it with a default. This simple oversight destroyed the entire brand feel.
Trap 2: The Dangerous “One-Stop-Shop” Supplier
You find a supplier on Alibaba or at a trade show with a massive booth. Their catalog has everything: t-shirts, USB drives, metal badges, and even custom bobbleheads. You think, “Great! This is convenient. A one-stop solution.”
From a printer’s and manufacturer’s perspective, this is the single most dangerous red flag.
Here is the industry insight you need to understand: manufacturing is highly specialized.
The factory that excels at textile screen-printing (for t-shirts) has zero overlap with the factory specializing in plastic injection-molding (for USB drives). And both are completely different from a factory that handles resin-casting and hand-painting (for figurines).
They use different machines, different raw materials, and different skilled labor.
That “one-stop-shop” is almost certainly a trading company.
They don’t make anything. They take your order and subcontract it to three different factories—likely the cheapest ones they can find.
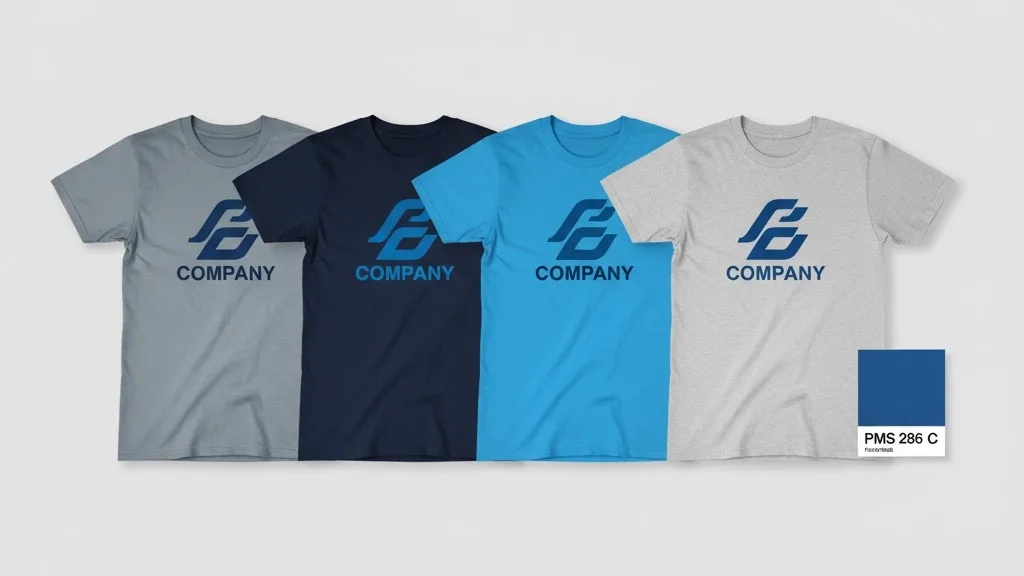
This is lethal for your brand. Your single Pantone “Brand Blue” will be interpreted by three separate factories, using three different processes, on three different materials. The result? You will get back three completely different shades of blue. Your brand consistency will be shattered.
Printer’s Solution Part 1: Secure Success Before the Sample
The good news is that you can eliminate most of these failures. As printers, we know success is locked in before the first sample is even made. It all comes down to controlling the technical details.
1. The “Print-Ready” Tech Pack: Your Core Instruction Manual
Stop sending just a logo file. To get a professional result, you must provide a professional “Technical Pack,” or “Tech Pack.” This is your non-negotiable instruction manual for the factory.
It must include:
- Precise Pantone (PMS) Codes: Don’t just say “blue.” Specify “PMS 186 C.” This gives the factory a universal color target to aim for.
- A “Material Benchmark” (The Pantone Trap): Here is an industry insight: a Pantone code is not a magic wand. That PMS code you pulled from your paper brand guide (the “C” stands for “Coated Paper”) will look completely different when applied to plastic, metal, or fabric.
- We once had a financial client who was furious that their “company blue” on a metal business card holder looked dark and muddy. Their previous supplier just said “okay” to the PMS code. The truth is, that color cannot be perfectly replicated on anodized aluminum.
- The Solution: The best practice is to send a “physical color standard”—a plastic chip, a piece of painted metal, or a swatch of fabric that you approve. Tell the supplier, “This is the standard, not the paper chart.”
- Exact Dimensions and Placement: Don’t let the factory guess. Provide a technical drawing showing the logo is exactly 50mm wide and placed 20mm from the bottom edge.
2. The 3-Phase Sampling Process: How to Avoid the “Golden Sample” Trap
Have you ever approved a perfect pre-production sample (PPS), only to receive a bulk order of 5,000 units that are all flawed?
We call this the “Golden Sample Trap.”
Here’s the secret: that “perfect” sample was likely handmade by the factory’s single best technician over two days. The bulk order, however, will be made by 50 different workers on a high-speed assembly line, under pressure to hit a quota. The quality will inevitably drop.
Never rely on a single sample. To protect your brand, you must enforce a 3-Phase Sampling Process.
- Phase 1: Material & Color Swatch: Before any product is made, have the factory send you small swatches of the actual bulk material and apply your actual brand color. This confirms the foundation is correct.
- Phase 2: Tooling Mock-up (for 3D Products): If you are making a custom-molded item (like a figurine or a unique USB drive shape), demand an unpainted “white model” first. This allows you to approve the shape, structure, and feel before any color or logos are applied.
- Phase 3: The Pre-Production Sample (PPS): This is the final, complete sample made using the approved materials and processes. This is your last checkpoint before you authorize mass production.
This phased approach changes sampling from a one-time gamble into a controlled, step-by-step approval process, giving you power at every stage.
Printer’s Solution Part 2: A Vetting Checklist to Expose Bad Suppliers
Once you have a “print-ready” tech pack and a phased sampling plan, you need to find a partner who can actually execute it.
As a brand manager, you’re not expected to be a manufacturing expert. This makes it easy to be fooled by a smooth salesperson. To solve this, you need to sound like an expert.
You can instantly filter out 90% of low-quality suppliers by asking a few “insider” questions. A bad supplier will give a vague answer; a great supplier will welcome the technical discussion.
Use these three “litmus test” questions.
1. The Color Question:
“How do you manage Pantone matching on different materials? What equipment do you use to measure the color accuracy, like the Delta E (dE) value?”
Why this works: This single question reveals if they are a professional factory or a simple workshop.
A bad supplier will say, “Don’t worry, we match by eye. It will be very close.” This is a massive red flag.
A professional supplier will explain how they manage color. They’ll discuss the challenges of matching your PMS code on plastic versus fabric. They’ll confirm they use a spectrophotometer (a color-measuring device) to keep the “Delta E” (the mathematical distance between two colors) below a certain number.
As color expert Shoshana Burgett, formerly of X-Rite Pantone, notes, color “can increase brand recognition by up to 87%… however, achieving that consistent color across a global supply chain… is a massive technical challenge.” You need a partner who treats this challenge with technical respect, not guesswork.
2. The Process Question:
“For my logo on this product, do you recommend screen printing, pad printing, or UV printing? Why?”
Why this works: This tests their actual manufacturing expertise.
A bad supplier, (who is likely a trading company), will just say “Yes, we can do it.” They won’t have an opinion because they don’t make anything.
A professional factory will pause and analyze. They’ll say, “Because your logo has four colors and is on a curved surface, pad printing is the best choice for precision. Heat transfer might distort the logo.” Or, “For this material, UV printing will offer the best durability.”
You don’t need to know the right answer. You just need to see if they have a thoughtful, technical reason for their choice.
3. The QC Question:
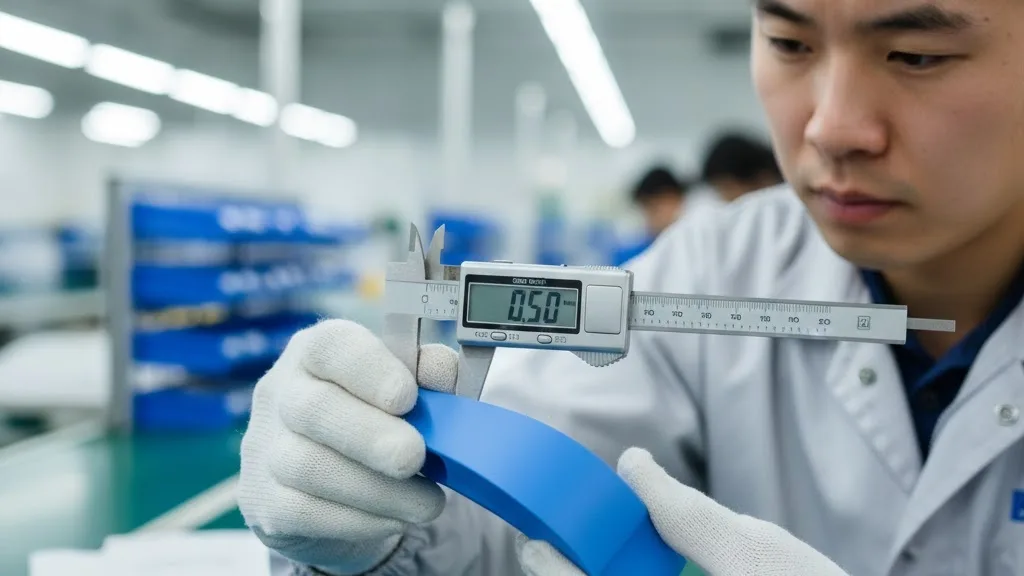
“What is your full quality control process? Do you use in-line inspections, or only a final inspection during packing?”
Why this works: This tells you if they prevent problems or just hide them.
A bad supplier will say, “We check everything at the end.” This is too late. It means they’ve already produced 5,000 flawed units and will likely just ship you the “least bad” ones.
A professional supplier will describe their “in-line” or “mid-production” checks. For example: “We check the first 100 units off the line. We also have a dedicated QC inspector who pulls 10 random units every hour to check for color consistency and print alignment.”
This is the process of a partner who is actively working to protect your quality.
Printer’s Vetting Checklist: Key Questions to Ask Suppliers
| Question Category | The “Insider” Question to Ask | What You’re *Really* Testing |
|---|---|---|
| Color Accuracy | “How do you manage Pantone matching on plastic vs. paper? What is your target Delta E?” | Their understanding of color science and if they use professional equipment. |
| Process Expertise | “For my logo, why do you recommend pad printing over screen printing for this curved surface?” | If they are a true factory with technical expertise, not just a trading company. |
| Quality Control | “Do you perform in-line inspections, or only a final QC check during packing?” | If they *prevent* defects during production or just *hide* them at the end. |
Need to Ensure Quality on Your Next Print Project?
While we specialize in book printing, our quality control principles apply to all manufacturing. Get a quote from our team to see how our expertise can protect your project from costly errors.
A Note on Highly Custom 3D Products
These questions work perfectly for standard items like pens, t-shirts, and notebooks.
However, if your project involves highly complex, custom 3D products—like a brand mascot figurine or a custom bobblehead—the standard for vetting is even higher.
This is no longer simple “printing.” This is a deep, multi-stage craft involving 3D modeling, mold-making, material science, and detailed hand-painting. A single mistake in the mold or a slight error by a painter can make your beloved mascot look “off” or “creepy.” It’s the ultimate “brand betrayal.”
In this situation, you must work with a ‘Specialist Factory.’ For example, some teams that truly specialize in this craft (like Topwin), have their entire process built around the ‘precise 3D replication of a brand’s identity.’ Whoever you choose, ensure they can demonstrate this level of deep, verifiable expertise.
Part 4: The Final Line of Defense: How to Avoid the “D-Day” Nightmare
There is one final, fatal trap: missing your deadline.
A classic (and costly) industry mistake is underestimating the total logistics chain. Consider the case of a marketing manager who ordered 3,000 custom power banks for a massive Las Vegas trade show. To save on costs, he selected “sea freight.”
The disaster? He forgot to factor in the 30 days for sea freight, the 7 days for US inland trucking, and the 3 days for the convention center’s warehousing queue.
His 3,000 power banks arrived at the trade show… the day after it ended. They became 3,000 expensive, useless bricks.
In the printing industry, a missed deadline is an absolute failure. We use a process called “Deadline Back-Calculation” for every single job. You must do the same.
Your “D-Day” is not the day the supplier ships the goods. Your “D-Day” is the “must-be-on-my-desk” date.
From that date, you must subtract:
- Inland trucking and delivery (7-10 days)
- Customs clearance (3-5 days)
- Ocean or Air Freight (30+ days for sea, 7-10 for air)
- Mass production (20-30 days)
- Sampling and approvals (10-15 days)
Suddenly, you see that for your Christmas event, you needed to have approved the final artwork back in September. A professional partner will force this conversation with you from day one.
Your Contract: The Final “Firewall”
Finally, protect yourself with your contract. Never, ever use vague language like “Bulk order must match the sample.”
A “perfect sample” and a “5,000-unit production run” are two different things. You must define your quantitative acceptance standards.
Your contract should include specific, measurable metrics like:
- Color: “Color must match approved sample with a $\Delta E$ (Delta E) of 3 or less.”
- Print: “Print registration tolerance must be under 0.5mm.”
- Durability: “Print must pass a 3M tape-pull adhesion test.”
- Defects: “Major defects (e.g., wrong color, wrong logo, non-functional) have a 0% acceptance rate. Entire batch is subject to rejection.”
This language changes “quality” from a subjective opinion into an objective, measurable fact.
Conclusion: Stop Buying “Products,” Start Finding “Partners”
From our perspective as printers, a promotional item is not a “freebie.” It is a physical extension of your brand identity. It deserves to be treated with the same technical seriousness as your official website or your flagship brochure.
The path to sourcing custom promotional products from China is filled with technical traps, but you are now equipped to navigate it.
Stop using “price” as your primary filter. Start using this “printer’s checklist.”
Use the “print-ready” tech pack to provide clear instructions. Enforce the “3-phase sampling process” to control quality. And use the “insider vetting questions” to find a true technical partner—one who respects your brand enough to argue with you about a Pantone color.
Discuss Your Project with a Printing Expert
Our team’s expertise in print quality control can guide you. Let’s discuss your goals and build a long-term partnership based on trust and quality.
References & Notes
[1] Brand Recognition & Color: The statistic noting that color can “increase brand recognition by up to 87%” is a widely cited figure in branding and color theory, often attributed to studies by Pantone and other marketing analytics firms, underscoring the critical nature of color consistency in manufacturing.
[2] ASTM D3359 (Tape Test): This refers to the standard test method by ASTM International for measuring coating adhesion. The “3M tape-pull test” is a common industry term for this procedure, which involves applying and removing pressure-sensitive tape over cuts made in the coating to assess its bond to the substrate.


