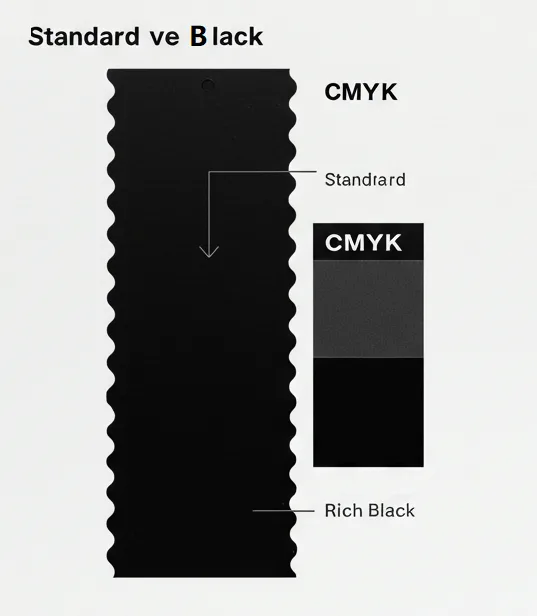
Tired of faded blacks and messy white edges ruining your book printing quality? This comprehensive guide reveals exactly how to use Rich Black formulas and crucial Overprint Settings correctly in Adobe InDesign & Illustrator. Get professional, error-free results for your books and print with confidence every time.
To achieve deep blacks in print, use a Rich Black CMYK mix (incorporating Cyan, Magenta, and Yellow inks along with Black) for large solid areas instead of relying solely on 100% K ink. To prevent white gaps around 100% K text or lines placed on colored backgrounds, apply the Overprint Setting to those specific black elements using the Attributes panel in your design software.
In short, mastering Rich Black and Overprint Settings comes down to choosing the right black type for each element, knowing precisely when and how to apply overprint, and diligently verifying your settings before going to press.
Ready to see the exact CMYK formulas printers recommend, get step-by-step software instructions, and learn how to troubleshoot common issues? Let’s dive deeper.
When to Use Rich Black vs. 100% K
The rule of thumb is straightforward:
- Use Rich Black: For large, solid black areas needing depth and saturation (book covers, large background panels, very bold headlines).
- Use 100% K Black: For most body text (especially below 7pt or 11pt for large formats), thin lines, and any element where precise edge definition and avoiding fuzziness are paramount.
Finding the Right Rich Black Formula

You’ll find many Rich Black CMYK formula suggestions online, but treat them with caution.
- Common examples include C:30 M:30 Y:30 K:100 (Total Ink Coverage/TIC = 190%) or a cooler C:60 M:40 Y:40 K:100 (TIC 240%).
- These are starting points, not universal solutions.
The Crucial Factor: Total Ink Coverage (TIC / TAC)
Why the caution? Because Total Ink Coverage (TIC) – the sum percentage of all inks in one spot – matters immensely.
Exceeding the printer’s limit (which might be anywhere from 240% to 320% or more, depending on paper and press) can cause serious issues: ink not drying, smudging, offsetting onto other pages.
Industry standards bodies like the Ghent Workgroup (GWG) define acceptable TAC limits in their specifications precisely to avoid these quality issues; understanding why Total Area Coverage is crucial for print and ensures reliable print production.
Why “Ask Your Printer” is the Golden Rule
This leads to the single most important piece of advice, echoed by print experts like David Blatner (CreativePro Network): Always ask your print service provider. There is no universally “best” formula.
Their specific inks, presses, and crucially, your chosen paper stock (as different types of paper for book printing absorb ink very differently) dictate the optimal Rich Black mix and TIC limit.
Provide your printer with your specs and ask for their recommendation. This direct communication prevents costly assumptions and ensures a predictable result, especially vital in B2B book printing.
Potential Pitfalls of Rich Black
Be mindful of:
- Exceeding TIC Limits: Causes production problems.
- Color Casts: Incorrect CMY balance can tint the black.
- Registration Issues: Unsuitable for small text/fine lines.
- Ghosting: Faint colored edges might appear on fine details.
Rules, Risks, and Best Practices

Table Title: Core Rules: Rich Black & Overprint Settings
| Element / Situation | Recommended Setting |
Key Reason / Warning
|
| Large Solid Black Areas | Use Rich Black |
Provides deeper black. Ask printer for formula & ink limit (TIC)!
|
| Small Text / Thin Lines | Use 100% K Black |
Ensures sharp edges, avoids fuzziness.
|
| 100% K Text/Lines on Color | Set to Overprint |
Prevents white gaps/halos.
|
| White Text / Objects | Ensure Knockout (Default) |
CRITICAL: Never set white to Overprint! (It disappears)
|
Correct Overprint Settings are vital for clean typography and linework.
The Cardinal Rule: Overprint 100% K Text and Lines
For virtually all 100% K black text (C:0 M:0 Y:0 K:100) and thin black lines sitting on a colored or tinted background, set them to Overprint. This is the primary defense against visible white edges printing or gaps caused by tiny press misregistrations. Overprinting allows the black ink to slightly overlap the background color boundary, ensuring a seamless edge.
When Not to Use Overprint: Avoiding Disasters
Incorrect overprinting causes major problems. Avoid it for:
- White Objects: Never set white to overprint. It will vanish into the background (a critical error flagged by GWG standards).
- Light Colors on Dark: Colors will mix undesirably. Use Knockout to keep light colors pure.
- Brand Colors/Logos: Usually require Knockout for color accuracy, unless a specific transparent effect is planned and proofed.
- Spot Colors: Be cautious, especially with opaque inks like metallics. Consult your printer before overprinting spot colors.
Beware of Software Defaults and Hidden Settings
Don’t assume your software handles everything automatically. While InDesign might default its built-in ‘[Black]’ swatch to overprint, this likely won’t apply to custom black swatches you create (even if they are 100% K) or imported graphics. Always manually verify the overprint status of critical 100% K elements using the Attributes panel. Relying on defaults without checking is a common source of print errors.
Setting Up Rich Black & Overprint in Adobe Software
Here’s a quick guide for Adobe InDesign and Illustrator.
Setting Up in Adobe InDesign
- Rich Black Swatch: Use the Swatches panel (Window > Color > Swatches), click ‘New Swatch’, name it, set Type to Process, Mode to CMYK, enter your values (ideally printer-recommended), click OK.
- Overprint: Select the 100% K object, open Attributes panel (Window > Output > Attributes), check ‘Overprint Fill’ and/or ‘Overprint Stroke’. (Visual Aid: Screenshots are invaluable here).
Setting Up in Adobe Illustrator
- Rich Black Swatch: Use the Swatches panel (Window > Swatches), click ‘New Swatch’, name it, set Color Type Process Color, Mode CMYK, enter values, click OK.
- Overprint: Select the 100% K object, open Attributes panel (Window > Attributes), check ‘Overprint Fill’ and/or ‘Overprint Stroke’. (Visual Aid: Screenshots are invaluable here).
Consistently applying these Overprint settings InDesign or Illustrator ensures your files match your intent.
Checking Your Files Before Sending to Print

Setup is only half the battle; verification prevents costly errors.
Using Built-In Preview Tools
- Overprint Preview Mode: In InDesign/Illustrator (View > Overprint Preview), turn this ON. It simulates overprint interactions. Check if 100% K text looks clean on backgrounds and if white elements remain visible (don’t disappear). Tip: Also enable this in Acrobat Reader preferences (Page Display) for viewing proofs accurately.
- Separations Preview (InDesign): (Window > Output > Separations Preview). View individual C, M, Y, K plates to confirm 100% K is only on the K plate, and Rich Black uses multiple plates as intended.
Adobe Acrobat Pro’s Output Preview
For the most reliable pre-print check, use Acrobat Pro’s Output Preview tool (Tools > Print Production > Output Preview).
- Check Separations: Verify ink usage per plate.
- Simulate Overprinting: Visually confirm overprint effects.
- Check Total Area Coverage (TAC/TIC): Set your printer’s specified limit and identify areas exceeding it – crucial for Total Ink Coverage rich black validation. This helps check overprint settings PDF files thoroughly. (Visual Aid: Screenshots of Acrobat’s Output Preview checks highly recommended).
Making these checks part of your standard workflow is essential for reliable book printing.
Troubleshooting Common Print Problems
Even with care, issues arise. Here’s a quick guide:
Problem 1 : Printed Black Looks Gray/Washed Out. (Fix washed out black print)
Quick Check/Fix: Was 100% K used on large solids? -> Use appropriate Rich Black. Formula unsuitable for paper? -> Ask printer for recommendation. Check CMYK color settings/profiles. Request printed proof.
Problem 2 : White/Colored Halos Around Black Text/Lines. (Fix white gaps around text)
Quick Check/Fix: Is it exactly 100% K? Was Overprint Fill/Stroke checked in Attributes? -> Verify color definition & ensure Overprint is checked. If correct, discuss press registration with printer.
Problem 3 : Element Disappeared / Changed Color Unexpectedly.
Quick Check/Fix: Was a white element set to Overprint? Light color overprinting dark? Transparency conflict? -> Check Attributes panel meticulously, ensure white/light colors Knockout (unless intended), simplify transparency or consult printer on flattening.
Problem 4 : Ink Smudging / Offsetting / Drying Issues.
Quick Check/Fix: Is TIC/TAC too high from Rich Black? -> Reduce CMY values in formula (aim lower, like 190% TIC example). Confirm max TIC limit with printer. Discuss paper/coating options if high density needed.
Advanced Considerations & Best Practices
Beyond the basics, keep these points in mind for smoother production:
Balancing Cost, Quality, and Risk
Not every project requires the absolute deepest black everywhere. Consider the budget and purpose. Is the visual gain from Rich Black worth the extra vigilance regarding Total Ink Coverage limits on internal pages versus a cover?
Sometimes, excellent results with 100% K on good paper are sufficient and less risky for cost-sensitive projects, helping you reduce your book printing costs.
Making correct Overprint Settings for 100% K text, however, is almost always cost-effective by preventing reprints due to white edges printing.
Adapting for Digital Printing Nuances
Remember that digital printing presses behave differently from traditional offset regarding TIC limits, registration, and how Rich Black CMYK formulas render visually; understanding offset vs digital printing nuances is key.
Don’t assume offset rules apply directly. Always communicate with your digital print provider about their specific recommendations for their equipment.
The Habit of Verification
Software evolves, files get passed around, mistakes happen. Reinforce the habit: always perform those final checks using Overprint preview Adobe tools and Acrobat Pro. This diligence is your safety net against easily preventable and potentially costly print errors.
Conclusion: Print with Confidence
Mastering Rich Black and Overprint Settings transforms your ability to produce professional, high-quality books and avoid common frustrations. Key takeaways:
- Use Rich Black strategically: for large solids; use 100% K for small text/lines.
- Crucially, set 100% K text/lines: to Overprint.
- Never set white: to Overprint.
- Always verify using preview tools: and Acrobat Output Preview.
- Communicate proactively with your printer: – ask for their specs!
Applying this knowledge empowers you as you prepare your book files for printing, helping you minimize errors, reduce reprint risks, and achieve predictable, quality results. It strengthens your process and your relationship with print partners.


