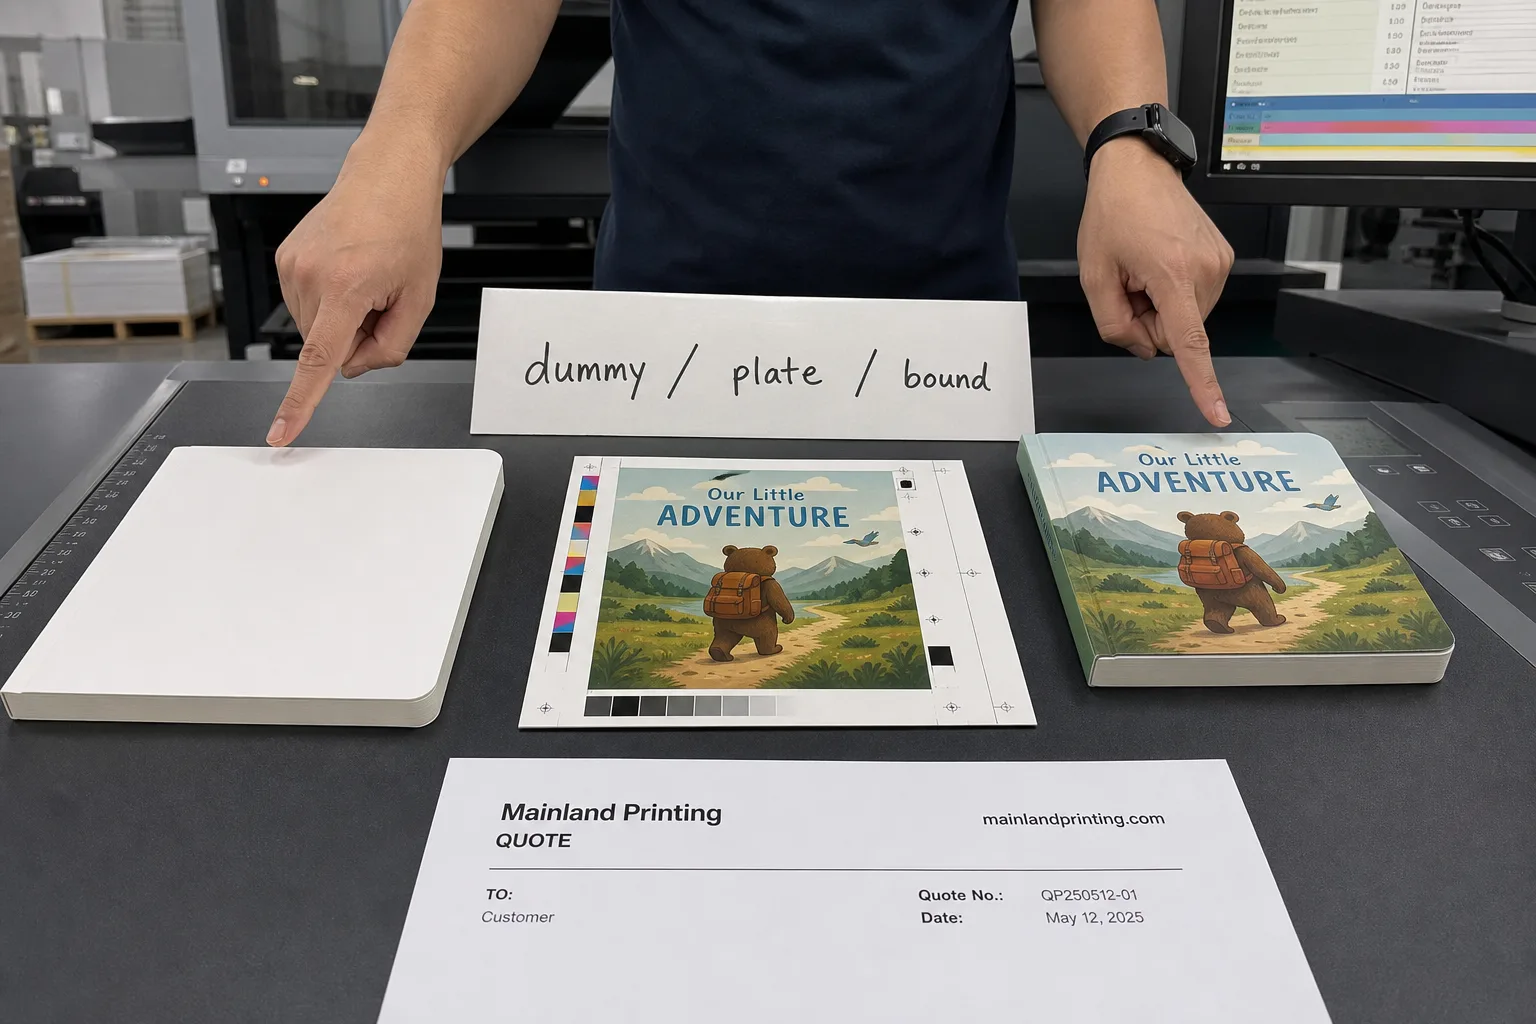
Panicking because your physical dummy book doesn’t perfectly match your calibrated monitor? You are not alone. Discover exactly why your hardcover digital sample looks different from the final offset run, and learn the exact pre-press framework to prevent costly manufacturing disasters.
A hardcover digital sample uses surface toner, producing highly vibrant colors and a stiff, hand-bound spine. An offset press pushes wet liquid ink deep into paper fibers, causing dot gain (darker images), and uses automated PUR glue that results in a softer, precisely calibrated binding.
Want to know the exact formula to bridge this physical gap? Keep reading. I am going to show you the exact “bifurcated approval” checklist that elite production managers use to eliminate cross-border printing risks.
Why Toner and Wet Ink Inherently Clash

The visual discrepancy between a digital sample and an offset run is not a manufacturing error; it is a microscopic optical shift driven by the substrate and the ink. If your art director is expecting an exact visual match, they are ignoring the foundational laws of commercial printing.
A digital sample typically utilizes digital toner or high-end inkjet technology that essentially sits on the surface of the paper. This creates highly saturated, slightly reflective colors.Conversely, large-scale production in a modernized Chinese printing facility equipped with advanced Heidelberg or Komori presses relies on liquid wet ink physically pressed deep into the paper fibers by multi-ton mechanical cylinders.
Digital printing and offset lithography remain two different processes. While digital has made tremendous strides in color gamut, the way toner or inkjet droplets interact with the surface of the paper is fundamentally different from how wet offset inks absorb into the fibers. You are evaluating two different physical behaviors. — Frank Romano, Professor Emeritus, School of Print Media, Rochester Institute of Technology (RIT)
The Mechanics of Dot Gain
This mechanical absorption triggers a physical phenomenon known as Dot Gain or Tonal Value Increase (TVI). When liquid ink hits the paper under extreme pressure, the halftone dots physically expand. We calculate this optical expansion using the Murray-Davies equation:
$$TVI = \left( \frac{1 – 10^{-D_t}}{1 – 10^{-D_s}} \right) \times 100\% – A_t$$
*(Where $D_t$ is the tint density, $D_s$ is the solid density, and $A_t$ is the theoretical dot area.)*
On the uncoated paper heavily favored by indie publishers and art book creators, the ink absorption is aggressive. Because the paper fibers are highly porous, dot gain can easily spike up to 18% to 22%.
What this means for your project is simple: if your pre-press files carry a high ink density, those intricate, separated shadow details visible on your digital proof will inevitably collapse into a solid, muddy black on the press.The digital toner on your sample book sits above these porous fibers, artificially protecting the image from dot gain. Judging an uncoated offset run by an uncoated digital proof is mathematically flawed from the start.
Production Specifications Comparison Matrix
| Parameter | Hardcover Digital Sample | Heidelberg / Komori Offset Run |
|---|---|---|
| Ink Application | Toner baked onto the surface | Wet liquid ink pressed into fibers |
| Mechanical Pressure | Minimal contact pressure | Multi-ton cylinder compression |
| Dot Gain (TVI) | Negligible (simulated via software) | 12% – 22% depending on substrate |
| Core Purpose | Validating structure, bleed, and layout | High-volume, standardized color reproduction |
Quick Guide: If your priority is structural and layout validation, rely on the Hardcover Digital Sample; if you face fine-detail or high-volume shadow reproduction challenges, optimize your files for the Heidelberg / Komori Offset Run.
For the broader production path, review this custom hardcover books guide before you finalize specifications, supplier selection, and budget expectations.
The Lamination Shift and Colorimetric Baselining

In commercial printing, the most frequent visual trap involves post-press finishes. A common scenario involves a creative director approving a vibrant, unlaminated digital proof, only to reject the production run because the cover feels “muted” or “dead.”
The underlying physics dictates that applying film lamination—specifically Soft-Touch or matte finishes—intrinsically alters the light refraction on the cover.This physical barrier reduces the ink’s lightness ($L^*$ value in colorimetry) by roughly 5% to 8%. Furthermore, digital toner reacting under a thermal lamination film refracts light entirely differently than offset ink trapped under the exact same film.
To bridge this gap, you must discard subjective visual perception under warm household lighting. Establish a colorimetric baseline.
A visual match is highly subjective and depends heavily on lighting conditions and the substrate’s white point. When moving from a digital proof to an offset press run, we must rely on standardized methodologies like G7, rather than expecting a perfect visual replica. — Don Hutcheson, Inventor of the G7 methodology
To implement a robust viewing workflow, you can follow this quick decision node to standardize your environment:
- Never evaluate a proof under standard 2700K residential warm lighting, as it artificially inflates the magenta and yellow channels.
- Always review proofs under standardized D50 (5000K) viewing conditions to ensure an objective spectrum.
- If a lightbox is unavailable, evaluate the proof next to a window at high noon under indirect natural sunlight.
Hand-Bound Samples vs. Automated Casing-In

Beyond optical shifts, the physical tension and tactile feedback of your sample book are frequently misinterpreted. When assessing a hardcover digital sample, buyers immediately test the opening resistance, the spine’s flexibility, and the depth of the hinge (the groove near the spine).
If the book feels unusually stiff, or if it snaps shut when laid on a table, the immediate reaction is to question the facility’s binding capabilities and structural integrity.Here is the hidden manufacturing reality: to deliver a physical prototype rapidly, a single digital dummy book is almost exclusively hand-bound or semi-automatically assembled.
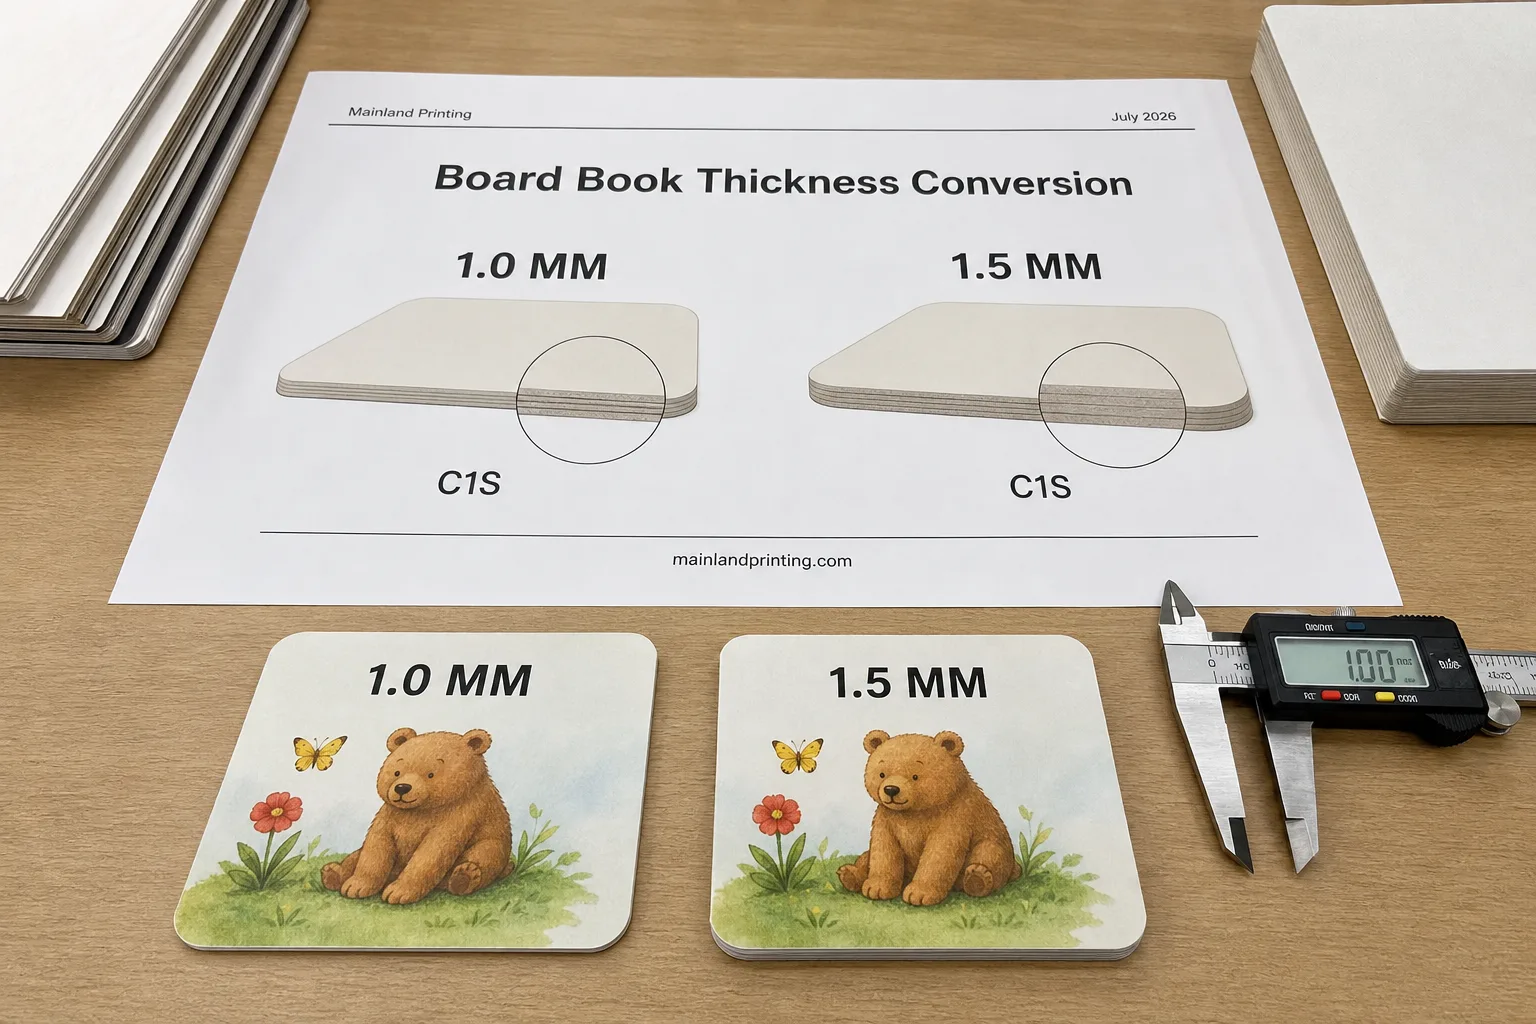
Hand-applied glue layers are inherently thicker and far less uniform, often exceeding 1.5mm in thickness. Furthermore, the hinge is pressed by a manual forming machine relying on a single-strike pressure application rather than sustained, heated mechanical calibration.Conversely, on a fully automated casing-in line, the PUR vs. EVA adhesive evaluation becomes critical, as mechanical nozzles apply a precise PUR layer calibrated to a thickness of 0.6mm to 1.0mm. The mechanical pressure applied to the spine and hinges is uniform, heated, and sustained.
You must also account for the hygroscopic properties of paper. During offset production, the printing press utilizes dampening solutions.Paper fibers swell and stretch slightly across the grain when absorbing this moisture. A 300-page art book in mass production might yield a bookblock 1mm to 2mm thicker than the completely dry, toner-baked digital print sample currently sitting on your desk.
Ready to Transition from Digital Mockup to Flawless Bulk Production?
Don’t let optical shifts or dot gain compromise your publishing debut. Our specialized pre-press architecture and advanced manufacturing lines protect your creative investment from file to delivery.
Defensive Pre-Press File Setup
Before your project ever enters the plate-making stage, you must engineer your Adobe InDesign or Illustrator files to survive the physics of the offset press.A modern production manager does not wait for the factory to fix problems; they defensively configure the files to mitigate risk using these critical execution nodes:
- Cap Your Total Area Coverage (TAC): Do not send files with 300%+ ink density. Defensively limit your rich blacks and heavy shadow zones to a maximum TAC of 260% to 280% using your specific ICC profile. This mathematically restricts the volume of wet ink hitting the paper, providing the necessary physical headroom to accommodate inevitable offset dot gain.
- Navigate the Rich Black Trap: On a digital sample, a 100% K (Black) and a Rich Black look nearly identical. On an offset press, a large background of 100% K will look weak, washed out, and gray. You must learn to fix rich black & overprint setup errors before platemaking. Use Rich Black for large solid areas, but never use it for fine typography under 12pt, as microscopic registration shifts on the press cylinders will cause the cyan or magenta to blur the text edges.
- Verify Grain Direction: Ensure your paper grain direction flows parallel to the spine. If a factory prints cross-grain to save paper costs, the pages will aggressively resist opening, and the cover boards will eventually warp into a U-shape under humidity changes.
The Bifurcated Approval Standard
Relying on a single physical prototype to validate every aspect of a high-value offset run is a fundamentally fragile risk-management strategy.To eliminate cross-border manufacturing disputes and guarantee predictability, elite production managers enforce the Bifurcated Approval Standard. This strategy effectively decouples structural validation from colorimetric verification. Stop trying to use one $150 dummy book to prove everything.
Track 1: The Structural Diagnostics (Digital Dummy Book). Restrict the use of your physical hardcover digital sample strictly to mechanical and layout diagnostics. When reviewing this sample, ask yourself only the following questions:
- Are the 3mm bleed margins safe, ensuring no vital artwork or text is trimmed off?
- Do the critical art elements on crossover spreads align perfectly across the gutter?
- Is the page sequence entirely correct, including the placement of blank endpapers?
- Does the physical bulk (thickness) of the paper feel appropriate for the book’s retail price point?
Do not use this laminated, hand-bound prototype to dictate your final CMYK conversion accuracy or your mechanical spine tension.
Track 2: The Optical Calibration (High-Res Flat Proof). For precise color calibration, you must strip away the optical interference of post-press laminations and hand-applied varnishes.Demand an Epson high-resolution flat proof (or equivalent inkjet contract proof). Mandate that the factory includes a standardized Fogra or G7 color control bar printed directly on the proof. Use this flat, unlaminated sheet as your sole contractual baseline for color accuracy.
The persistent problem of cross-border proof misinterpretation disappears the moment you enforce separate optical and structural pipelines.
The Financial Architecture of Proofing and Risk Mitigation
| Risk Factor | Cost of Mitigation | Cost of Failure | ROI Leverage |
|---|---|---|---|
| Color Shift / Dot Gain | $150 (Epson Flat Proof) | $20,000+ (Total Reprint) | 1:133 |
| Margin / Bleed Error | $200 (Digital Dummy) | $15,000 (Scrapped Bookblocks) | 1:75 |
| Spine / Grain Warpage | $0 (Pre-press query) | Complete Retail Rejection | Infinite |
Quick Guide: If your priority is protecting color fidelity, invest in an Epson Flat Proof; if you face structural complexity or custom page counts, prioritize a physical Digital Dummy to maximize your ROI leverage.
Engineering Predictability
Ultimately, a hardcover digital sample is not a flawless replica; it is a diagnostic instrument designed to surface pre-press errors before they are amplified by multi-ton offset cylinders.By separating your optical color assessment from your mechanical binding evaluation, you establish a resilient, bulletproof pre-press troubleshooting framework. You no longer have to cross your fingers and hope the Chinese factory understands your vision.
Partnering with a facility that enforces these precise physical tolerances—and proactively restricts your files from violating the laws of offset physics—guarantees your production run matches your strategic expectations.It transforms a high-risk, cross-border manufacturing process into a predictable, engineered delivery.